5. Running the tool
The operation of the Data Selector tool is explained in this section. While the interface is similar between the ArcGIS Pro, ArcMap and MapInfo implementations of the tool, there are some differences. This user guide is specific to the ArcGIS Pro version of the tool.
As discussed in the Setting up the tool section, the Data Selector tool is operated from the GIS application. It relies on the SQL tables containing any data that may be selected and a configuration document for setting up the tool. Therefore, before running the tool, ensure the following conditions are met:
The tool XML configuration file ‘DataSelector.xml’ has been set up and is named correctly.
One or more user XML profiles have been set up and are in the same folder as the tool XML file.
The Data Selector tool has been installed and set up.
See also
Please refer to the Setting up the tool section for further information about any of these requirements.
5.1. Opening the tool
To open the Data Selector tool in ArcGIS Pro, open the Tools menu bar and click on the Data Selector tool button (Fig. 5.1).
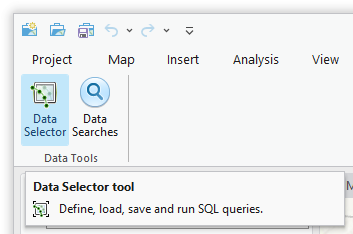
Fig. 5.1 Launching the Data Selector tool in ArcGIS Pro
Note
Once the tool has been opened the window pane will remain open unless it is manually closed. As with other dockable windows in ArcGIS Pro, the window can docked anywhere in the ArcGIS Pro application and can be pinned or hidden when not in use.
5.2. Initial set-up
In order to function, the tool needs to know the location of the XML configuration files. The first time the tool is run, or whenever the configuration file is moved, the user must specify the folder containing the XML files.
Click on the ‘Open folder’ button (Fig. 5.2).

Fig. 5.2 Click on the Open Folder button
Then navigate to the folder containing the XML files and click OK. If the tool XML file is present and its structure is correct, the list of user profiles will appear in the drop-down list (Fig. 5.3).
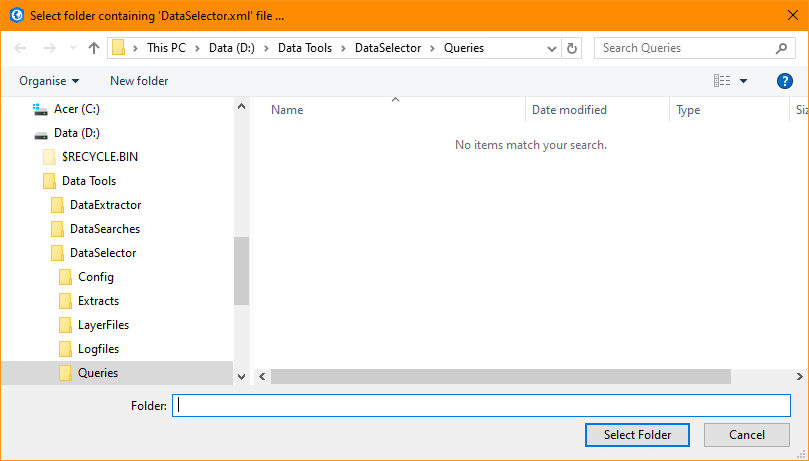
Fig. 5.3 Locating the configuration file folder
Note
The location of the configuration folder will be stored for future use.
5.3. Loading a profile
If more than one user XML profile is found, and the tool configuration file is configured to allow the user to choose the XML profile, then the Profile tab will appear to allow the user to choose an XML profile (Fig. 5.4).
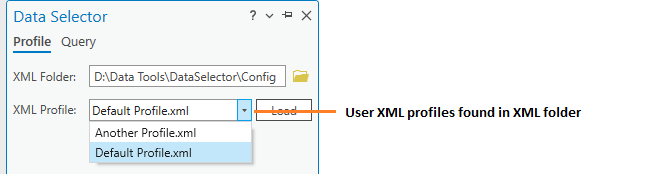
Fig. 5.4 Example list of XML profiles to select
Select a profile and click ‘Load’ to start the tool using that profile. If there are any structural issues with the selected XML profile, the tool will display a message with the error it has encountered, and not load any further (Fig. 5.5).
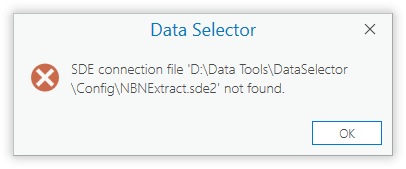
Fig. 5.5 Example warning message displayed for any XML structural issues
Provided that the selected XML profile is otherwise correct, the Select tab will display (Fig. 5.6).
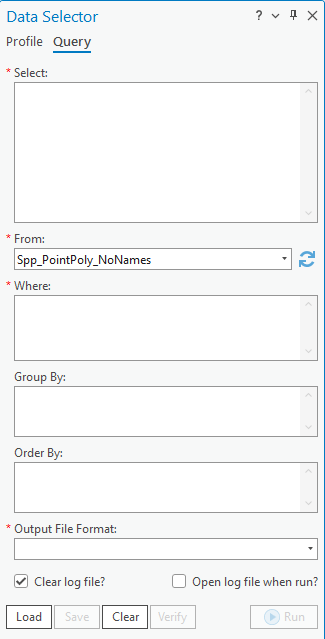
Fig. 5.6 The form displaying all of the available SQL fields and options
Note
If there is only one user XML profile, or if the tool configuration file is configured to not allow the user to choose the XML profile, then the default XML profile will lead automatically (if found).
5.4. Specifying the query
Specify the columns and SQL clauses that you wish to use to query the selected table. All syntax should adhere to SQL Server SQL syntax, and it is important that the correct part of the query is entered in the correct text box (Fig. 5.7).
- Select
Enter the columns you wish to select in the
Selectbox, including any changes in name (e.g.CommonName AS Name)- From
Select the required source table or view you wish to query
- Where
Enter any selection criteria in the
Wherebox- Group By
Enter any required grouping criteria in the
Group Bybox- Order By
Enter any required ordering criteria in the
Order Bybox.
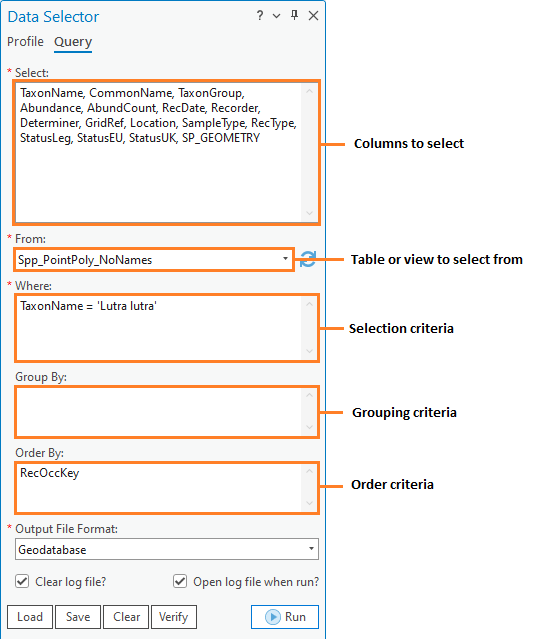
Fig. 5.7 Enter SQL Criteria
Caution
It is not necessary to include key words such as SELECT, WHERE, GROUP BY and ORDER BY. Doing so will make the query invalid.
Note
The tool is designed to run a SELECT query only and will not execute an action query (such as a delete, update or alter).
A simple example query is shown in Fig. 5.8.
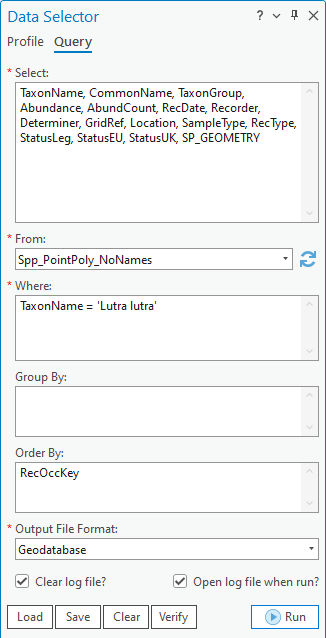
Fig. 5.8 Example of a simple query
Select the output file format to contain the selected records (Fig. 5.9).
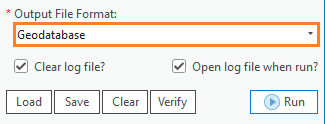
Fig. 5.9 Select the output file format
The following options are available in ArcGIS Pro:
Geodatabase
Shapefile
Text file (tab delimited)
CSV file (comma delimited)
Note
If the required output format is a spatial dataset (i.e. Shapefile or Geodatabase feature class), but the output does not contain a spatial column, then the output format generated will be different than that specified. For shapefiles a .csv file will be generated, and for geodatabases a table will be generated.
Finally, select whether the log file should be overwritten, and whether the log file should be opened upon completion (Fig. 5.10). Now the form is set up to run your query.
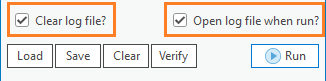
Fig. 5.10 Select the log file options
5.5. Running the query
Once the query has been entered and the options selected, click Run. You will be prompted for an output file (Fig. 5.11). Enter a name for your output and click Save. If an existing file is selected, the tool will prompt you for permission to overwrite this, or to choose a different name. Once the output name has been selected the tool will begin the process.
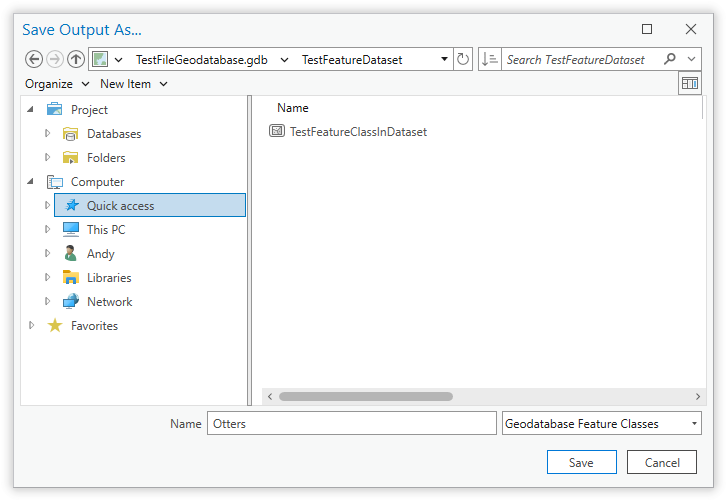
Fig. 5.11 Enter the name for your output file.
Note
There is no need to enter any file suffix (e.g. .shp). The tool will add this automatically.
While the process is running a progress bar will appear at the bottom of the form providing details of progress (Fig. 5.12).
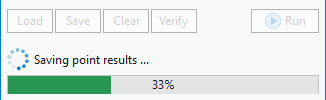
Fig. 5.12 The progress bar as the process is running
Once the process has finished the log file will be opened (Fig. 5.13), if required, so that you can check the process has completed correctly, and the results will be added to the active map as discussed above.
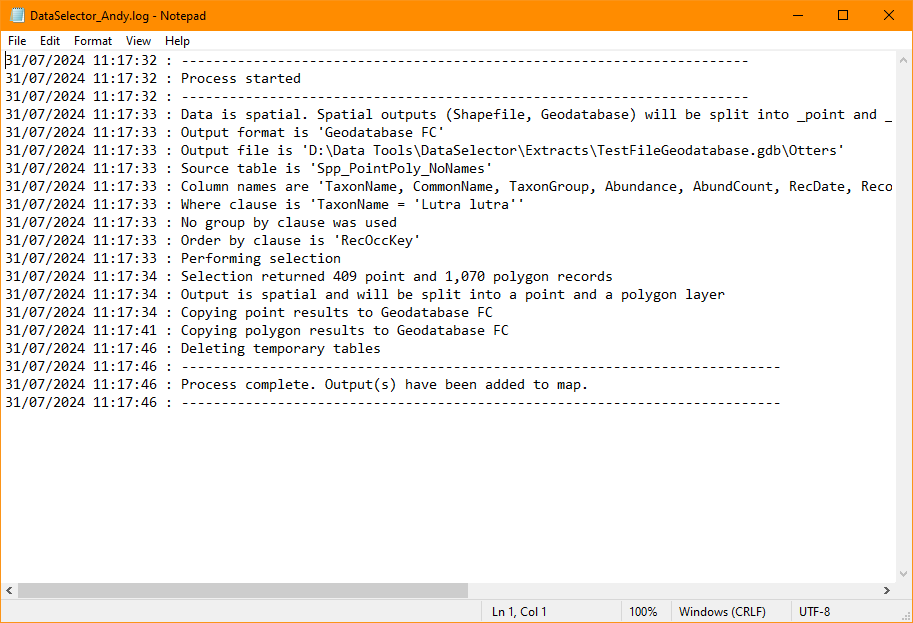
Fig. 5.13 The log file is shown when the process finishes
Depending on whether your query and selected output type generate a spatial or a tabular output, the output will be created and shown as follows:
- Spatial
If you are creating a spatial output layer, it may be split into point and polygon layers (if both geometry types are present in the output) and will be added to the active map (or to a new map if no map is active) in a grouped layer.
- Non-Spatial
If you are creating a non-spatial output file it will be added to the active map (only if a map is active), otherwise the file will be created but not added to ArcGIS Pro.
An example of spatial and tabular outputs in ArcGIS Pro is shown in Fig. 5.14.
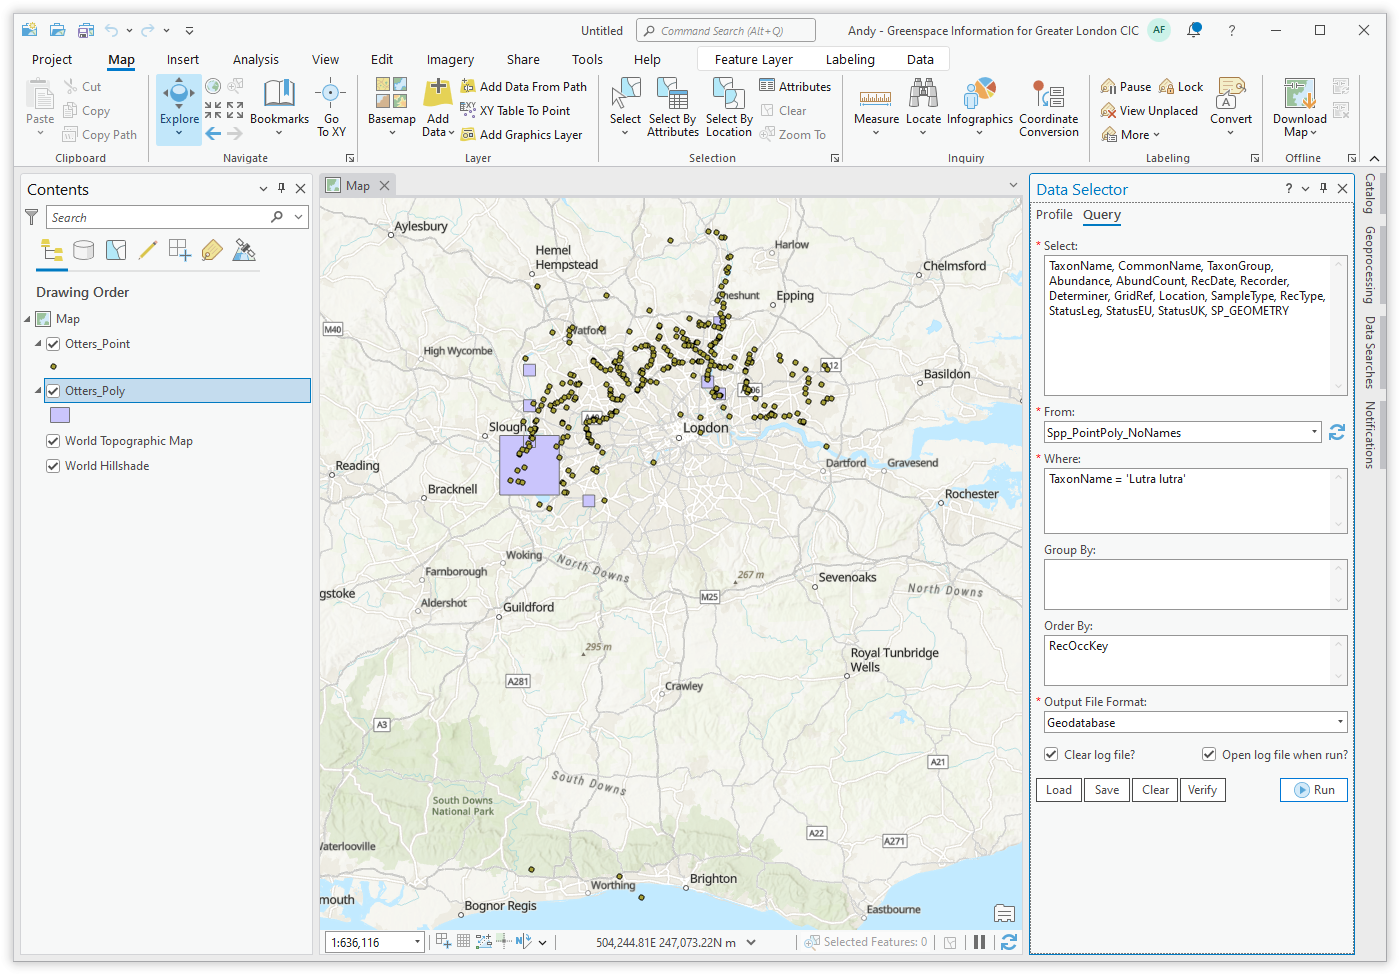
Fig. 5.14 Example output from a spatial query
5.6. Loading & saving queries
Queries can be saved for future use, so once a query has been written and saved it can be loaded and re-run by any user at any time and it will output results from the most up-to-date copy of the database.
Queries can be saved or loaded by using the Save and Load buttons (Fig. 5.15). They are saved as a simple text file with a ‘.qsf’ file type.

Fig. 5.15 Save and load queries